Now let’s get started with setting up an Application Load Balancer on AWS.
Pre-requisite
AWS Account : Sign in to the AWS Management Console : Go to https://console.aws.amazon.com and sign in to your AWS account.
Navigate to the EC2 Dashboard
First we are going to launch EC2 instances. Will launch 2 instances.
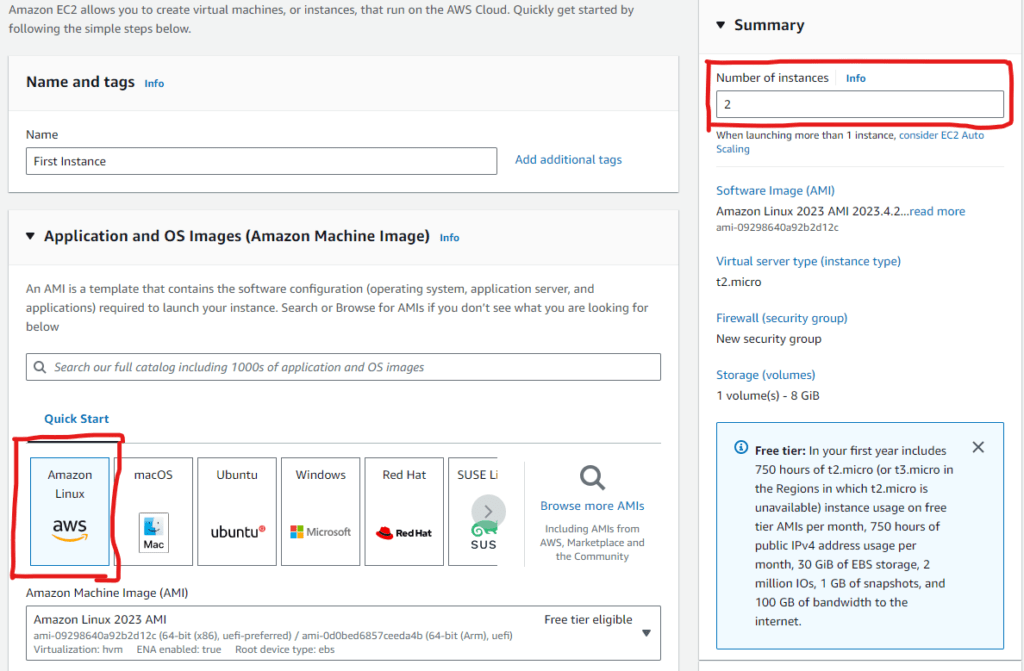
Select Instance type t2.micro
Keypair: We can proceed without a key pair as there is no need to SSH
Network Settings: Allow HTTP and SSH traffic
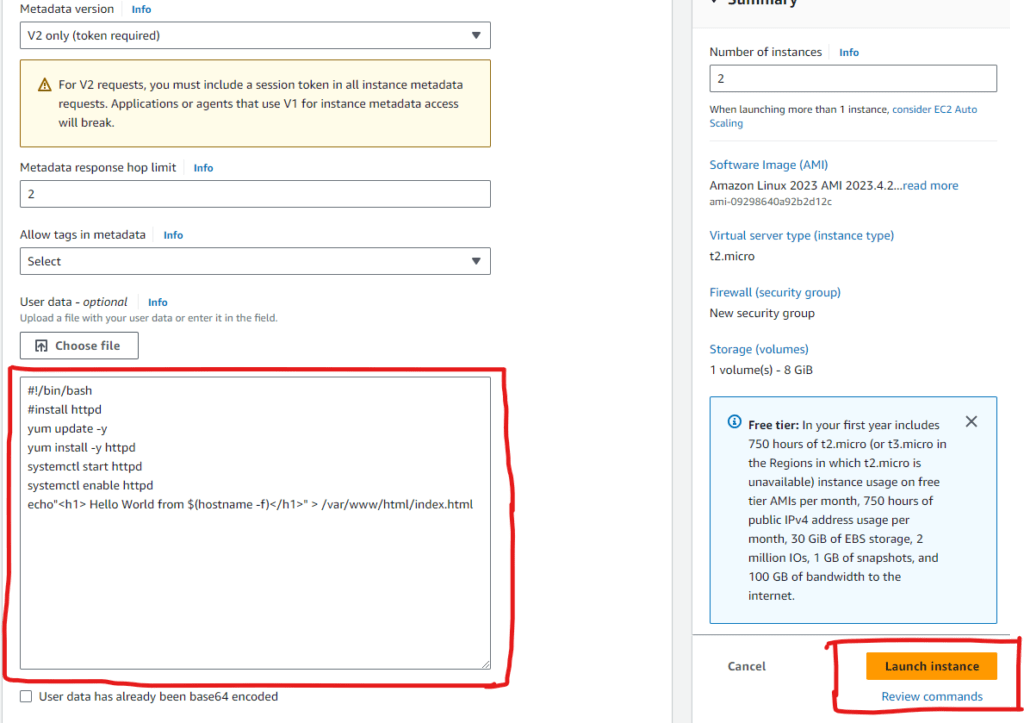
Select Advanced details and scroll down to user data and paste the follow script.
#!/bin/bash
# Use this for your user data (script from top to bottom)
# install httpd (Linux 2 version)
yum update -y
yum install -y httpd
systemctl start httpd
systemctl enable httpd
echo "<h1>Hello World from $(hostname -f)</h1>" > /var/www/html/index.html
Click Launch Intance
Want To Learn Configuring AWS VPC Peering Connection
Update the Instance names of your choice

After EC2 Instances are ready, click on any one of the instances and copy the public Ip addres or public Ipv4 DNS address and paste in browser.

Repeat the same with second instance

We can see two instances giving us two Hello World and the last part is changing. So now our primary goal is to access one URL and balance the load between two instances. For this we need to set up a Load Balancer
Go to Load Balancers
Click on create load balancer
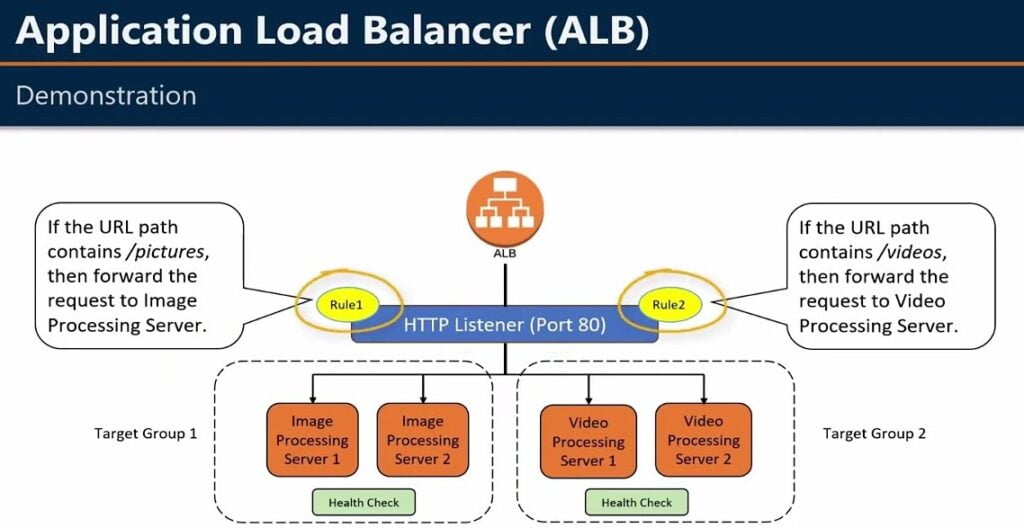
We have different load balancer types and for this hands on we are only looking at Application Load Balancer
Application load balancer is for HTTP and HTTPS traffic

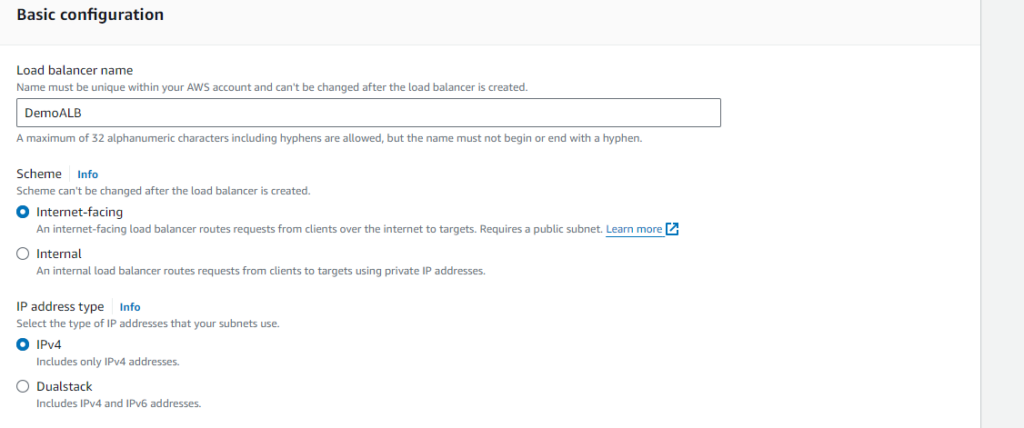
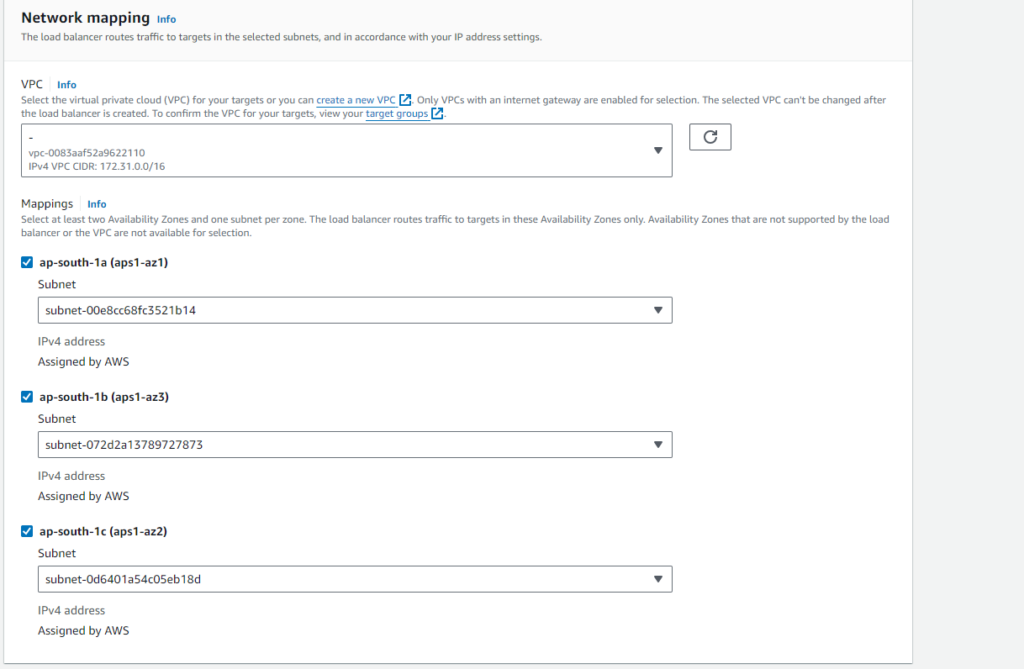
Create a Security Group for ALB with HTTP enabled
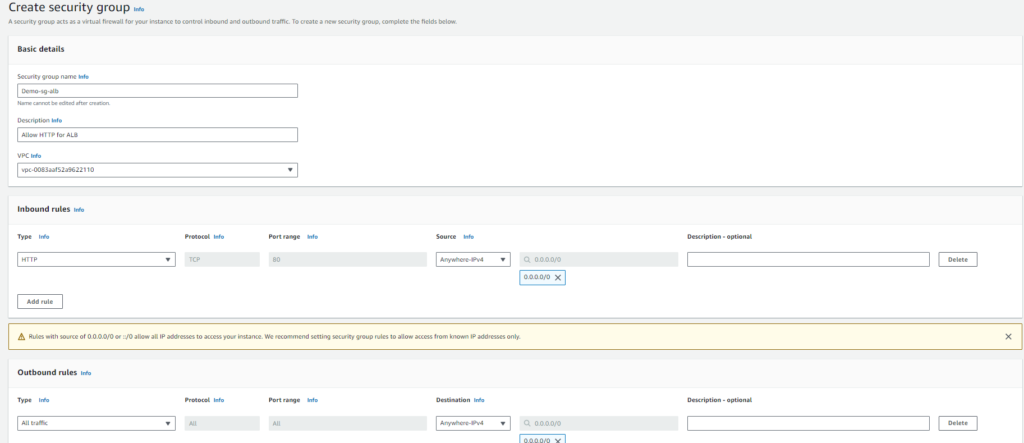

Now we need to route the traffic from HTTP port 80 to Target Group. It is a group of EC2 instances created. Click on Create a Target Group
In Basic Configuration: Select target type Instances
Target group name as your choice
Ip address type Ipv4
Protocol version HTTP1
Registered targets
Next, We will register the EC2 instances (in the case two, but it can be more ) for this target group. This implies that all healthy instances (or web servers) in this target group would receive equal or close to equal loads/web traffic, ensuring higher availability, scalability, and reliability of your application.
select the two instances and click on Include as pending below
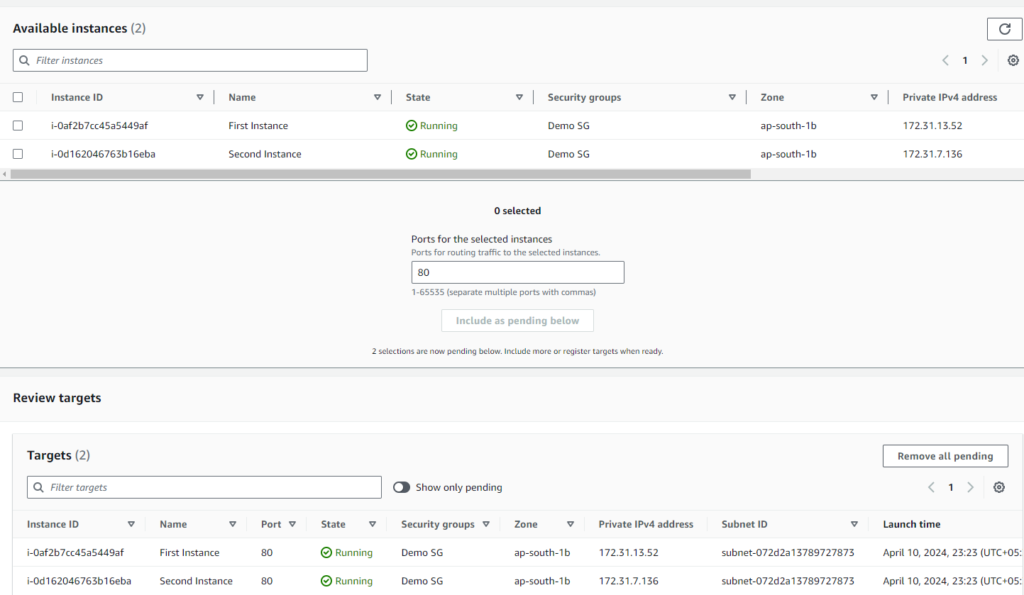
Review and click on Create target group
Attach the target group created to load balancer. Now the load balancer will be in provisioning state.

Wait until state becomes Active.

Copy the DNS name and paste in browser and you can see Hello World through Application load Balancer. If you now refresh the browser and keep on refreshing, you can see the target is changing, it’s because application load balancer redirecting between both the EC2 instances. This is the proof that load balancing is actually happening.


As usual, I’m interested in hearing your opinions on this article. Do not hesitate to leave a comment!

Pingback: AWS VPC Peering
Pingback: Serverless Computing with AWS Lambda: A Beginner's Guide - wordwyzz